Sunday 10 November 2013

Pottery shop now open!

Well, it's taken a while, but I've now added a shop to my website. I'm sure there'll be lots of teething troubles. I'm still unsure of the shipping rates. The shop has a facitliy that allows me to link shipping rates to a carrier's table of charges. I've spent quite a bit of time working on this, but still don't feel that it's accurate. My main concern is that I don't over charge people for postage.

Taking the photographs was also a challenge. However, I'm quite pleased with the results, given that they were all done with a cheap compact camera and a roll of wall paper for the background!

Let's hope people like my work enough to buy it!

www.henhousepottery.co.uk

Monday 4 November 2013

Results of yesterday's firing

So here are some pictures from yesterday's firing. The pics aren't great as I used the ipad and poor lighting, but you'll get the gist!. I'm really please with the plate on which I used 3 glazes and also the mug, which had a blue underglaze. I'll certainly be doing that again. The biscuit barrel should have had the whole rim glazed in one colour I think - I'd hoped that the red would run more into the cream, but hey ho! Overall, I'm quite pleased with the results. The glaze fired well to just below cone 6. Both clays (red and white) behaved and there was no bloating. I gave the glaze a 45 minute soak at cone 6 and I'm sure this helped settle the glazes. They're very glossy and smooth.


Saturday 2 November 2013

Here we go again!

Ground hog day once again! A new glaze, a new set of hopes. Is this the corner I've been hoping to turn? I really love making pottery, and that in itself is incredible given the amount of disappointment that it seems to bring me. I just don't ever seem to get the results that are living in my mind. Of course there are the occasional pieces that bring a pleasant surprise, but on the whole I seem to make frequent trips back to the drawing board after every new experiment.
So, to this batch of work. I've returned in the main to the white stoneware clay that I've used previously, as it fired predictably well, unlike the red stoneware that bloated at higher temperatures. However, saying this there are a couple of samples of the red clay body - the biscuit barrel in the foreground to name one. I've included these, as this next firing is only going to cone 6 and I'm optimistic that any bloating will be insignificant. The main cause for excitement are the new glazes I've invested in. I've bought some brush on glazes that promise amazing effects! I haven't gone mad and spent a fortune yet, as I've made this mistake before. So, this batch are all in just 3 glaze combinations of red and white. The firing instructions are straight forward, so I might not screw things up too badly...but now I've said this my immediate thought is 'pride comes before a fall!'

Sunday 6 October 2013

The long and winding road.

This week I I've felt myself becoming increasingly frustrated. I know exactly what I'm working towards, but due to my very limited time combined with the very slow process of making pottery, I feel like it's taking me an age to achieve my goals. I've included some pictures of the items that I've been making this past week. They're now ready for bisque firing, but that won't happen until next weekend now, as I'm at work all this week. It'll then be another week before I get them glaze fired. I only manage to get an hour or two in the studio in the evenings after my work and family commitments and I've been getting irritated this week about it. It's not good, as I want to make something of my pottery, but if it's going to cause friction both inside me and within my family then it'll only make the road rougher.
As well as making I've also been trying to lay the foundations of an internet shop - Etsy. I've made the shop, but there's only one item listed on it (I had to list one to open the shop). I had been concerned that it would take me months and months to build up enough stock to fill the shop. I put this issue out to some other crafts makers who suggested I make a range of one off items which I then photograph and list as made to order. I can therefore fill the shop without having the problem of making a storing loads of items. Now it's been pointed out it seems obvious, but sometimes I just need someone to state the obvious.
I've also begun to lay the foundations for a workshop that I want to run in the spring. I've found a really good venue, but need to have further discussions with the owner over the dates. I've also organised hire of 6 wheels. I hope to run the workshop for beginners. the idea is for people who've always wanted to try throwing pottery to come along and spend a day learning the basics. I envisage this as the type of day that could be bought as a gift for someone. early days yet, but I'll post more as it develops.


Friday 27 September 2013

Bad firing

Well, it comes with the territory - getting used to disappointment. I'd really hoped for a lot from this glaze firing, but ended up disappointed. I included a few pieces made from the keuper red clay that I posted previously, alongside a load of Jen's porcelain favours and decorations. I'd also popped in a couple of the soup bowls with the hare design. These had been thrown in a white stoneware and then decorated with brown slip.
Anyway, the keuper red ware all bloated really badly - rendering it unsaleable. The white stoneware bowl decorated with brown slip fired ok, but the brown slip vanished! Did it run? I really don't know - I know that it's meant to be a semi transparent slip, but to completely disappear? These hare bowls were therefore not as I'd wished and I really wouldn't want to sell them.
I guess , from what I've read, that the keuper red bloated because it was over fired. I was told that it was ok up to stoneware temperatures even though it's labelled as an earthenware clay. Clearly not the case. I'm happy to fire to lower temperatures, but the only issue is that Jen makes porcelain ware that needs firing to higher temperatures, so sharing a firing is more sensible. I'm waiting for advice from potclays at the moment.
It really is disappointing. You just think you're making progress and then you feel like you're taking steps backwards.
I still have a lot to learn.

Tuesday 24 September 2013

Motivated

As the title says, I'm really fired up about the possibilities of the work that I'm doing at the moment. I'm working furiously to try and get the work ready so that we can get a firing in at the weekend. It's frustrating that I have to spend my day working in the real world. I could get my pottery done so much quicker if work didn't eat up all of my time! So, I'm spending every evening until 11pm in the studio. I just wanted to put a blog post on, as I'm aware that blogging seems to be done in fits and starts and I'm determined this time to post regularly.
Last night I managed to slip 8 bowls inside and outside, slip and handle a set of my new style mugs and then add names to them with some small printers stamps. I also managed to slip two large vases.
I did have a bit of a disaster at one point. In my rush to get on I grabbed a pot of slip off the shelf and immediately gave it a really good shake to mix it up. unfortunately the lid wasn't on properly and me and the studio ended up covered in cobalt blue slip! Fortunately, all of my work was under plastic and most of the slip hit me and the wall!
When I have had time to look online I've been scouring the web for ceramic decoration that appeals to me. I really loved the work of Terri Kern as it reminds me a lot of the type of illustration work that I loved when I was at university.

Crazy chicks want to get their noses into everything, I keep having to chase them out of the studio before they manage to get their beaks into anything.

Thursday 19 September 2013

New decoration

Here's the lidded jar that I threw with the Keuper red clay the other day. I brushed slip on and then gave it 15 minutes to dry very slightly. While it was drying I sketched out some ideas for the decoration.
I'd had an idea at work the other day of using seahorses in the design. Seahorses have a special place in my heart, as I remember buying the dry bones of one when I was on a primary school trip to the zoo. I took the seahorse home, delighted with my souvenir. When I got home my dad went mad that I'd wasted my money on such a pointless item. There was a big row and I remember being really upset by the whole thing. I think my dad felt bad about the whole thing, because he later apologised (maybe mum had had words!). It's one of those childhood incidents that seems to have resonated through the years in our family. Whenever any of the family make a dubious purchase, the story of the seahorse surfaces again.
Anyway, my initial idea had been to have the seahorses face to face, forming the heart shape, with their tales entwined. I soon realised that there wouldn't be enough space on the pot without making the seahorses really tiny. I then thought about just getting the heart in. After a few sketches I managed to complete the design by incorporating the entwined tales as a filler between the hearts.
I'm please with the finished design and feel confident that I can improve it in future pots, given that this is sort of a prototype! It's going to be bisque this weekend and then glazed next week. I'll post a picture of the finished item then.
I'm so motivated at the moment and have more designs in my head than I have pots, or time to make them. They're all going into the sketchbook though and maybe they'll eventually see the light of day.

Monday 16 September 2013

New clay

After speaking to Potclays (who are always a great source of advice) I've now bought some red stoneware clay (Keuper red), which I've been advised will help me to achieve the results that I want. I came home tonight really keen to make some pots that I can get dried in time for bisque firing at the weekend. However, I first had to clean up all the evidence of the white stoneware clay that I'd been using until now. I didn't want the new clay getting contaminated with the old clay. This turned into a bit of a mammoth task. I must have spent 2 hours scraping and washing the wheel tray, surfaces, bats and tools. It made me realise that I need to work in a more organised / tidy way. from now on I'm going to make sure that after every throwing session I wipe down the surfaces and remove waste clay from the wheel tray.
Eventually, I did manage to throw a simple jar and lid. I'll get this trimmed and slipped in the next couple of days, and then decorated at the end of the week before firing at the weekend. that's the plan at least!
The clay was a little softer than my previous batch of white stoneware and I was able to throw it easily. It felt smooth and very maliable, but wasn't too sticky. I'll keep you updated with how I progress.

Sunday 15 September 2013

Which clay? I'm confused!

Yesterday was spent milling about and checking the kiln every hour or so. The firing took around 12 hours and reached cone 10 at around 11:30 last night. I'd previously had problems getting to this temperature - the kiln always seemed to stall at around cone 8 or 9. I ended up emailing Simon Leach, who advised me to raise the bottom shelf off the kiln floor and create a little 'tunnel' to improve the airflow around the kiln. This seems to have worked.
I wasn't as excited as usual about this firing, as it was through necessity. I'd promised a customer a set of soup bowls and the original ones hadn't fired well and so this was attempt number 2. To ensure success I made twice as many as she'd ordered. As a result the kiln was full of these and very little else. 
The bowls were ok...I'm not delighted about the firing results, but it wasn't a disaster. The thing is, I'm getting bored of using the same glazes. Over the past few weeks I've subscribed to a few potter's blogs and they've really inspired me. I want to make my work more attractive and I really want to do more sgraffito and slip decoration. To get the results that I want I'm going to have to change the clay that I use. I've been using a white stoneware clay that's great for throwing. It's smooth and very plastic and over the past couple of years I've learned it's limitations. To achieve the results that I now want I'm going to have to change to a red clay. I'm beginning to feel a little bamboozled by the options available. Do I need a terracotta clay? Should I change to earthenware? Will I need an electric kiln?


A lot of the potters that I admire - Doug Fitch, Margaret Brampton, Hannah McAndrew to name but a few (...there really are loads), use red clay, which I assume they fire to earthenware temperature? If so, are their pots porous ie. are they functional? I'm relatively new to all this and I'm having to learn fro the snippets of info I find on the web. It's a slow process, with lots of mistakes, and lots of trial and error.

I need advice...help please!

Thursday 12 September 2013

Savouring the moment

No matter who I speak to nowadays, on the whole the story tends to be pretty similar. Everyone's too busy! Regardless of the job they do, or their personal circumstances it seems like we're all just expected to squeeze more into a day to maintain an average standard of living. As a result, the opportunities to stop and smell the roses become fewer as we rush through life.
Last weekend, I was watching Anna play on my wheel. She was completely absorbed by the feeling of the clay in her hands and I could tell that at that moment nothing else mattered to her other than achieving the shape that she had in her mind. I could completely empathise with her. Making pottery (for me at least) requires concentration. Even when I'm making a large repeat batch of pots, each one needs that focus, or before you know it you lose the form you're aiming for or even worse the pot! It's that level of concentration that makes it so appealing. You just have to switch off from everything else. After an hour on the wheel I always feel refreshed. I seem more able to relax and can put the rest of the day's stresses into perspective. It really is a good way of drawing a line under the day.

Anna concentrating and loving it!

Tuesday 10 September 2013

September sgraffito!

I feel that my pottery has taken a turn into a completely new direction this month and It's a long time since I've been this excited about something!

Saying that making pottery is a time consuming business really is an understatement. So, anything that speeds up the process has always been a bonus in my eyes. This month however, I've come to the realisation that maybe trying to speed things up isn't really allowing me to get the best out of myself and really reach my potential.
So, what's changed? Well, Jen suggested I decorated some plates with some hares and moons. I really liked the idea and began to think about how I could realise the image that was in my head. I knew that what I wanted would be difficult to achieve by painting on glazes - I did a couple of tests and wasn't happy with the results. The thing is I've always been good at drawing (I worked as an illustrator after university), and I wanted to use this skill. So, I decided to apply some brown slip to some white stoneware bowls that I had and then scratch it back to create the image (scgraffito technique).
The process is very time consuming. Funny thing is I got so engrossed in what I was producing that I didn't really care. By the time I reached the fourth bowl, several hours later, I'd really refined the design and felt that it was of a good standard (the image below is the first of the 4 bowls - I'll post pictures of the later bowls when they're fired).
As I scratched away I really began to feel that this was the beginning of something. Ideas for future designs began to flood my mind. I've been jotting them down in my sketchbook all week. I really can't wait to share them. Jen is trying to restrain my imagination, saying that I should develop the hare and moon design. She's absolutely right of course, but I'm keen to explore all my other ideas too. For the time being I'm going to stick with hares and moons, varying the design according to the pot. I'm doing caddies next, and maybe cups and saucers.
As for this being a time consuming process, well I've had to factor that into the price of these pots. Maybe they'll sell and maybe they won't, but I just hope that there are people out there who appreciate that a quality hand made item takes time to produce and has an associated cost. I'll try to keep the costs down, I really want people to enjoy these pots as much as I enjoy making them.
Keep checking in, there's a lot more to come!

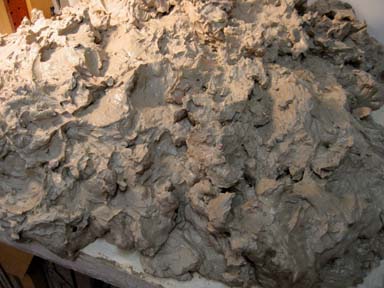
This is the first bowl I used the scgraffito technique on. It hasn't been glazed or fired yet. Pictures to come next week.

Wednesday 28 August 2013

Soup Bowls

I've thrown a new batch of soup bowls. You can see the finished item below. I'm thinking of a variety of designs to decorate the rim. Hens, flowers and hearts are in my head at the moment.

Thursday 28 March 2013

Life and death.

Easter hasn't ever really meant much to me. I'm not religous and only ever think of it as a holiday half way between Christmas and summer. However, sometimes things happen that focus one's thoughts a little more than usual.
I've been teaching the Easter story to my class at school this past few weeks. Going through this ancient story with my class has led me to look at it again with fresh eyes. I've found that this happens a lot when teaching something that you've known for years. You have to unpick the details, so that you can give a clear explanation. Teaching a subject always gives me a much deeper understanding of it than I had before. So, the story got me thinking about this deeper understanding I'd acquired and, of course, about new beginnings.
Then,this afternoon,  just as I was trying to make sense of all these thoughts, I had some very sad news about a death in my family. While I was driving home tonight I got thinking about this special person's legacy. She'd made a difference in the world. She'd raised a beautiful family who've all gone on to make a difference in their own way, as, in turn, will their children. It's sad, but beautiful.
Finally, I arrived home and was greeted with some new arrivals in our house (below).

As I said, I'm not religous, but the events of this past few days have certainly made me think about life, death and the future. Days like these, that supercede the mundane, make me feel as though I've reached a turning point.

It's not a post about pottery (I don't think?), just musings about my day.

Photo: Our new girls!
They don't have names yet, any suggestions?

Friday 22 March 2013

Today and last year in film!

A quick clip made by my daughter on the ipad - sorry it's poor quality, I don't know much about file formats etc. It's something I'd like to get better at! This second video I made last summer - I just wanted to feel warm again!

Wednesday 20 March 2013

New Firing schedule

I was really eager to see the results of this glaze firing as I'd tried a different firing schedule. In previous firings I'd basically brought the kiln up to cone 9 temperature, reduced for half an hour and then oxidation until cone 10 falls. After reading more about gas firing schedules I decided that I needed to have a much more controlled approach to firing if I'm ever to produced consistently repeatable results. I used two packs of cones in this firing; a set for the reduction stage (cones o11-o9) and a pack for the final temperature (cones 8-10). I steadily brought the temperature up to cone o10 and then put it into reduction for half an hour. I closed the dampers and partially blocked the flu with some firebrick. During the reduction I increased the gas pressure slightly. I was a little surprised to see the temperature continue to increase during the reduction, as it usually really slows at this point. Following the reduction I opened the dampers slightly  (1/4 inch) and opened the flu to try and create a neutral atmosphere. the plan was to maintain these settings until cone 9 fell and then open all dampers for a final period of oxidization until cone 10 fell. However, the kiln stalled at just below 1200 degrees c. Cone 9 had fallen and the kiln was in full oxidation, but never reached cone 10.
In retrospect I realise that I had the bottom shelf too low. It was packed with lots of flat heart wedding favors and a couple of canister lids, with the shelf above only an inch or so higher. The lids were a dull grey blue and had clearly not had a good reduction as they were meant to be a bright blue. I think the low shelf had affected the convection within the kiln, resulting in the failure to reach temperature.

Overall, the firing results were mixed. The tenmoku glaze fired well both in the top and bottom of the kiln. The reduction at the bottom meant that the canister lids were a different colour to the bodies which renders them as seconds. the wedding favours which were decorated with copper oxide fired well despite not producing the colours I'd hoped for. the glaze on a couple of the mugs ran onto the shelf and then split when they cooled. here a re a few photos.

 
I was quite pleased with the fruit bowl.

 
I made 50 of these favors, most of which were on the bottom shelf of the kiln. the writing had copper oxide rubbed into it. A combination of their position in the kiln, the lower temperature / poor convection led to the resulting colour I think.
 
 
The Tenmoku glaze fired really well throughout the kiln.
 
 
I stupidly placed the lids of these canisters in a different part of the kiln to the bodies, hence the colour difference.


Tuesday 12 March 2013

Exploding pots...aaagh!

Pride comes before a fall! I was so proud of my first bread crock and had been thinking about how I was going to decorate it. In my eagerness to get it fired it seems I didn't get it thoroughly dry before the bisque firing. I brought some of the pots into the house to try and dry them out quicker. I usually leave them in the oven for an hour or so before firing if I'm in any doubt about their dryness. In this instance i thought the pot was dry enough.
The broken lid is only part of the damage. What you can't see from the picture is the big hole in the pot's base. :-(


On a brighter note, I've joined UK Handmade today. Early days yet, but you can see more at: http://ukhandmade.ning.com/profile/DavidBarber

Saturday 9 March 2013

Saturday 8th March

Throwing soup bowls today. Really enjoyed making these. Izzy came in to take some pictures, she's snapping everything at the moment in the hope that she'll find a winning picture for the rotary club photo competition. She also added her own creative touch...see below!


Wednesday 6 March 2013

Reclaiming clay

To reclaim clay you'll need two of the most valuable commodities a potter has (or hasn't in my case) - time and space!
It's not the most glamourous part of the pottery process, but unless you want to disappear under an ever increasing mountain of clay scraps and slurry, reclaiming clay is a necessary evil. This weekend I plan on preparing to reclaim. I don't have a pugmill (yet), so have to reclaim manually. To do this I have to make sure the clay is fully dried out. During winter this is not as easy as it might seem. Up until recently I've been drying my pottery in the house as the studio is always too cold. However, I've now installed a wood burning stove in there and so hopefully this'll speed up the drying process.

Once I've got a bucket of dry clay I can then smash it up with a hammer into smallish (gravel sized) pieces. I'll then pour the dry contents into a bucket with an old cloth lining it. (The cloth helps when lifting the wet clay from the bucket. I have seen a wire wastepaper basket used as a bucket liner to lift the clay out.).

Next I fill the bucket with water and a drop of vinegar. The vinegar helps to break down the clay quicker. After a few days I'll drain off some of the excess water leaving behind clay that's a thick buttery consistency. This mixture is then spread evenly over a plaster bat. (I make my plaster bats by pouring plaster mix into large thick foil turkey trays).

As the clay drys out I'll turn it so that it drys evenly. once it becomes stiff enough I'll knead it and then store it in plastic bags.

i'm hoping to get a pugmill this year to speed up this process, but of course this involves those other commodities that are alsways in short supply, - space and money!

Monday 4 March 2013

Throwing large

I've been throwing larger pots recently and have had to put in some concentration as well as sweat. As I don't throw larger pots very often, I have to re-learn how to do it. This got me thinking that I should write down the little lessons that I learn and save myself some time in the future. Hence this post. These are based on my experience of throwing 10lb and upwards lumps of clay.

1. Make sure the clay is well kneaded and not too hard. This really helps when it comes to getting it centred. Well kneaded clay responds much better when on the wheel.

2. Centering - this is something that really takes a bit of muscle (see point 1 - clay that's not too hard). I try not to rush centering larger lumps of clay, you have to be patient. Keep the pressure on the clay using equal pressure with both hands - left hand from the side right hand from the top. Use the full spread of your hands. With larger lumps of clay I use my forearm as well! Be beligerent! You're the one in charge and the clay will eventually respond. The main thing is don't rush.

3. Opening - again you can't rush. Concentrate on forming the base of the pot. I tend to pull the clay out wider than I want the eventual base as when I begin to pull the walls up the base naturally gets narrower.

4. Pulling the walls - As with all pots, get the height first (don't rush). I've tried several ways of getting the walls to come up consistently from bottom to top. There are several techniques that you can use -fingers,  knuckle lift, palm lift etc. I've tried all of these, but tend to encounter problems with the clay getting 'dry' during the pull causing an uneven pull. Personally with large pots I prefer to use a sponge in the right hand to ensure that the walls remain lubricated during the lift. As you make more pulls take care that the walls at the top don't get too thin - remember, you've still got to leave some clay to create the width! make sure that you're bringing clay up from the bottom, but be careful that you're not digging in too much at the bottom with your right hand. If the walls at the bottom become too thin they won't hold the weight of all of the clay above. Conversly, if the walls at the top become too thin then they'll fold. Leave plenty of clay at the top to make your gallery (if you're including one).

5. Add the gallery before shaping the pot. If you try to do this when you've made the finished shape then chances are the downward force that you'll need to apply when forming the gallery will cause the walls to buckle.

6. Form the shape of the pot carefully and always keep in mind that the clay at the bottom of your pot is carrying a lot of weight - pull it too thin and it'll slump. If it does start to lose its shape and you try to get it back into shape you'll more than likely cause the top to lose shape and at worse slump.

7. Know when to finish. Something i never seem to learn!

I'm sure that there are far better guides to making large pots, these are what seem to work for me.
I'll try to make a video and put it onto my youtube channel next weekend.

Saturday 2 March 2013

Big pots.

I've been quite busy recently, getting pots made. I made a few tea / coffee cadies and posted some pics on my facebook page. This led to someone asking if I could make a bread crock for them. I don't tend to throw large pots very often as they take up so much space in the kiln. However, as I have a couple of tall pots sitting on shelves in the studio waiting to be fired I thought that one more large pot could make a kiln full of these bigger pots. The bread crock was made from around 9lbs of quite stiff clay. It was a real wrestling match getting this centred and I probably could have saved myself a workout by using softer clay; lesson for next time!
I've just finished lugging the bread crock and I'm pondering what if any decoration it'll have when fired. I also threw a handful of soup bowls tonight with a flat rim that'll be great for adding decoration to.
I'm really enjoying making pottery now that I've fitted a stove in the studio. it's so much easier to find the motivation to go into the studio when it's warm in there!

I included the mug in the picture to give some indication of the size. The picture on the left was pre lugging. Sorry about the poor quality of the second picture.


Thursday 14 February 2013

stampers

I made some stampers for the coffee and tea caddies. I'd have like some different lettering, as these weren't easy to remove from the clay after pressing in. I did dab talc over the clay, which helped a little. hopefully i'll have some pots to use these on soon.

Wednesday 13 February 2013

Great article on reduction firing

I've jsut found a really good article about reduction firing a gas kiln, written by Linda Arbuckle. See it here: http://lindaarbuckle.com/handouts/reduction_fire.pdf
I've clearly still got lots to learn, but thanks to articles like this hopefully each firing should see better results. Looking forward to the next kiln load now!

Tuesday 12 February 2013

The firing results


Overall I'm really pleased with this firing. I left the reduction until cone 10 was reached and then soaked at this temp for an hour. The blistering seems to be less prevalent. A couple of the storage jars are cracked, but I think they were already present before firing, due to the clay freezing while wet.

Sunday 10 February 2013

Hot, hot, hot!!!

Almost there! Actually, I took this about an hour ago, and the kiln soon reached cone 10 after this. It's now in reduction.
I lit the kiln at 9:30 am and it's now 8pm. In the past I've put the kiln into reduction before reaching cone 10 and then turned it off almost as soon as it got there. I'm going to let it soak for an hour tonight though and then gradually reduce the gas pressure for a while afterwards. The reason being the glaze in the last firing was riddled with pin holes. Hopefully leaving it for longer will give the glaze time to heal itself. I've read that the pinholes are caused by gases escaping from the clay body. The clay that I'm using at the moment has more of a rough / porous looking surface when bisque fired and is possibly why the problem seemed more evident in the last firing. In previous firings with the finer white stoneware the pinholes haven't been much of a problem.
I'm also going to allow the kiln to cool for longer and won't open it until Tuesday night.
I'll try to post pictures then.

Saturday 9 February 2013

paintings and pots

Hello, sorry it's been such a long time since I posted! i do have an excuse, sorry meant 'reason'! I've made quite a bit of work recently, but quite a bit of it has been damaged by the freezing conditions. The sub zero temperatures arrived before the pottery had dried and unfortunately a lot of it split as the water in the clay froze. I did manage to salvage about half of the work which I'm due to glaze fire tomorrow. I'll bring it into the house in future!
I've also been doing some painting recently. Just quick still life studies in oil. I've been doing these mainly to get some confidence in the media, as I've not really done that many oil paintings before.
Tomorrow I fire the first glaze firing of 2013. Pictures to follow...